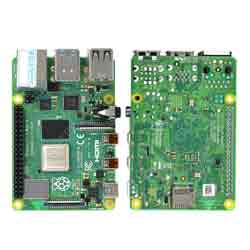
Raspberry Pi 3板载了无线网络适配器和陶瓷天线,不需要额外增加无线网卡就可以把它打造成一个无线路由器。
有一种方法是给Raspberry Pi刷上OpenWRT等路由器固件,这样它就变成了一个比较正宗的路由器。
另一种方法是开启树莓派无线网络适配器的AP功能,并且共享其有线网络。这样依然使用Raspbian系统,可以发挥Raspberry Pi作为一个微型服务器的优势。
以下描述如何开启树莓派无线网络适配器的AP功能,并且共享其有线网络,实现无线路由功能。
安装软件包
需要安装2个软件包:
1 | sudo apt-get install hostapd dnsmasq |
hostapd将开启无线适配器的AP功能,dnsmasq是DHCP和DNS服务器。
1.设置静态IP
需要将无线接口wlan0的IP配置成静态地址。
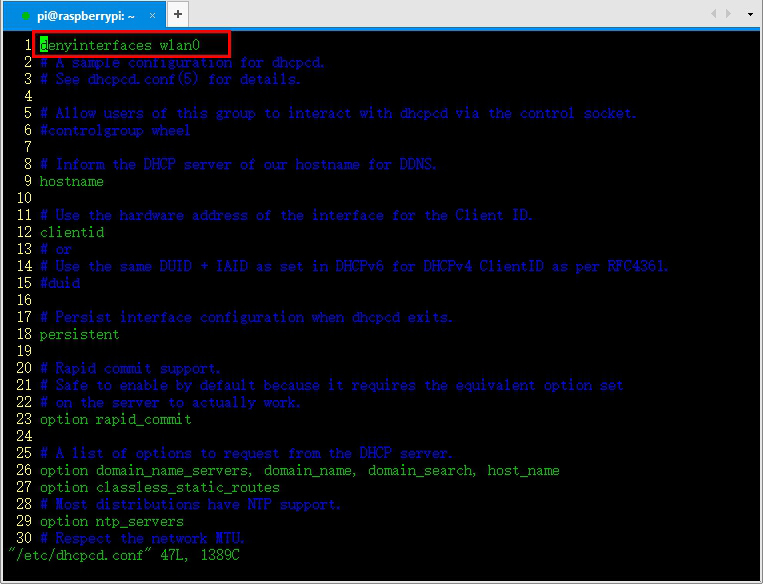
首先让dhcpcd不再管理wlan0,避免设置冲突。
修改文件:
1 | sudo vi /etc/dhcpcd.conf |
在文件开头增加一行:
接下来设置wlan0的静态IP,修改文件:
1 | sudo vi /etc/network/interfaces |
把wlan0相关的内容修改成如下内容:
8 | broadcast 192.168.8.255 |
192.168.8.1 是给树莓派做路由器分配的网关IP,这个不能与局域网其他路由器网关IP重复,若重复此处可以修改IP地址为其他网关。
重启服务和wlan0
1 | sudo service dhcpcd restart |
通过ifconfig可以看到wlan0的IP已经设定好了。
2.安装hostapd
输入命令安装,hostapd将开启无线适配器的AP功能。
1 | sudo apt-get install hostapd dnsmasq |
新建配置文件:
1 | sudo vi /etc/hostapd/hostapd.conf |
添加如下代码
23 | ht_capab=[HT40][SHORT-GI-20][DSSS_CCK-40] |
32 | ignore_broadcast_ssid=0 |
41 | wpa_passphrase=raspberry |
以上内容中,ssid=RaspberryPi是无线网络的名字,wpa_passphrase=raspberry是密码(8位及以上)。
然后测试配置是否正确:
1 | sudo /usr/sbin/hostapd /etc/hostapd/hostapd.conf |
通过手机等设备应该可以搜到名为RaspberryPi的WiFi,还不需要连接。
如果没有问题,按Ctrl+C停止测试。
使上述设置生效:
1 | sudo vim /etc/default/hostapd |
将#DAEMON_CONF=""修改为DAEMON_CONF="/etc/hostapd/hostapd.conf"。
3.安装DHCP服务
输入命令
1 | sudo apt-get install isc-dhcp-server |
备份配置文件
1 | sudo mv /etc/dhcp/dhcpd.conf /etc/dhcp.dhcpd.config.bak |
编辑新的配置文件
1 | sudo vi /etc/dhcp/dhcpd.conf |
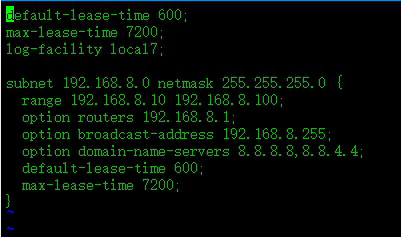
修改成如下内容:
01 | default-lease-time 600; |
05 | subnet 192.168.8.0 netmask 255.255.255.0 { |
06 | range 192.168.8.10 192.168.8.100; |
07 | option routers 192.168.8.1; |
08 | option broadcast-address 192.168.8.255; |
09 | option domain-name-servers 8.8.8.8,8.8.4.4; |
10 | default-lease-time 600; |
此处设置的IP与上面的IP网关对应。
重新启动服务
1 | sudo service isc-dhcp-server restart |
4.开启ipv4转发
修改文件:
1 | sudo vim /etc/sysctl.conf |
去掉net.ipv4.ip_forward=1前面的“#”号。
通过iptables做NAT转发:
1 | sudo iptables -t nat -A POSTROUTING -o eth0 -j MASQUERADE |
2 | sudo iptables -A FORWARD -i eth0 -o wlan0 -m state --state RELATED,ESTABLISHED -j ACCEPT |
3 | sudo iptables -A FORWARD -i wlan0 -o eth0 -j ACCEPT |
这些配置重启后就失效了,需要保存下来:
1 | sudo sh -c "iptables-save > /etc/iptables.ipv4.nat" |
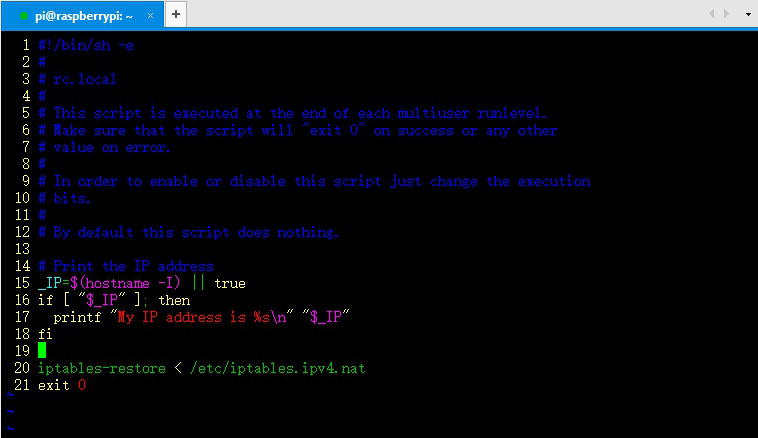
设为开机自动加载:
在exit 0上方增加:
1 | iptables-restore < /etc/iptables.ipv4.nat |
启动服务:
1 | sudo service hostapd start<br data-filtered="filtered"> |
到此所有的配置都完成了,重启:
等Raspberry Pi重启完成,就可以用手机等设备连接该WiFi上网了,名字和密码是之前在/etc/hostapd/hostapd.conf文件中设定的。
连接后设备会获取到192.168.8.10----192.168.8.100之间的IP,并且可以通过树莓派连接的有线网络连上互联网,起到了无线路由器的功能。
如果遇到问题,可以通过以下命令检查服务情况。
1 | sudo service hostapd status<br data-filtered="filtered"> |