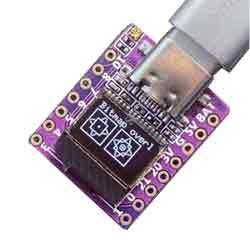
ESP32 C3 0.42LCD网页WIFI客户端
一、打开arduino IDE
二、选择芯片
1、点击tools
2、点击board
3、点击esp32 ,选择esp32-c3
三、烧录代码
#include<WiFi.h>
// Enter your WiFi SSID and password
charssid[] ="iPhone";// your network SSID (name)
charpass[] ="8888888888";// your network password (use for WPA, or use as key for WEP)
intkeyIndex =0;// your network key Index number (needed only for WEP)
intstatus = WL_IDLE_STATUS;
// if you don't want to use DNS (and reduce your sketch size)
// use the numeric IP instead of the name for the server:
//IPAddress server(74,125,232,128); // numeric IP for Google (no DNS)
charserver[] ="wifitest.adafruit.com";// name address for adafruit test
charpath[] ="/testwifi/index.html";
// Initialize the Ethernet client library
// with the IP address and port of the server
// that you want to connect to (port 80 is default for HTTP):
WiFiClient client;
voidsetup(){
//Initialize serial and wait for port to open:
Serial.begin(115200);
while(!Serial){
;// wait for serial port to connect. Needed for native USB port only
}
// attempt to connect to Wifi network:
Serial.print("Attempting to connect to SSID: ");
Serial.println(ssid);
WiFi.begin(ssid, pass);
while(WiFi.status()!= WL_CONNECTED){
delay(500);
Serial.print(".");
}
Serial.println("");
Serial.println("Connected to WiFi");
printWifiStatus();
Serial.println("\nStarting connection to server...");
// if you get a connection, report back via serial:
if(client.connect(server,80)){
Serial.println("connected to server");
// Make a HTTP request:
client.print("GET ");client.print(path);client.println(" HTTP/1.1");
client.print("Host: ");client.println(server);
client.println("Connection: close");
client.println();
}
}
voidloop(){
// if there are incoming bytes available
// from the server, read them and print them:
while(client.available()){
charc =client.read();
Serial.write(c);
}
// if the server's disconnected, stop the client:
if(!client.connected()){
Serial.println();
Serial.println("disconnecting from server.");
client.stop();
// do nothing forevermore:
while(true){
delay(100);
}
}
}
voidprintWifiStatus(){
// print the SSID of the network you're attached to:
Serial.print("SSID: ");
Serial.println(WiFi.SSID());
// print your board's IP address:
IPAddress ip =WiFi.localIP();
Serial.print("IP Address: ");
Serial.println(ip);
// print the received signal strength:
longrssi =WiFi.RSSI();
Serial.print("signal strength (RSSI):");
Serial.print(rssi);
Serial.println(" dBm");
}
1将代码复制到Arduino IDE中
2用type-c线将电脑和esp 32-c3开发板连接,连接成功后,会在电脑管理窗口显示串口
3在Arduino IDE中点击Tools,然后点击Port,选择串口Adafruit QT ESP32-C3
4点击Verfy
5点击upload
6等待上传。
7上传成功后,http://wifitest.adafruit.com/testwifi/index.html加入这个网址。
8测试结果如下

说明WIFI已经在网页客户端中。