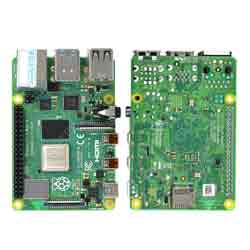
上两章我们讲解了在树莓派上如何点亮一个LED灯,这一章我们讲解一下按键以及事件中断。
一、bcm2835
05 | int main(int argc, char **argv) |
07 | if (!bcm2835_init())return 1; |
08 | bcm2835_gpio_fsel(KEY, BCM2835_GPIO_FSEL_INPT); |
09 | bcm2835_gpio_set_pud(KEY, BCM2835_GPIO_PUD_UP); |
10 | printf("Key Test Program!!!!\n"); |
13 | if(bcm2835_gpio_lev(KEY) == 0) |
15 | printf ("KEY PRESS\n") ; |
16 | while(bcm2835_gpio_lev(KEY) == 0) |
编译并执行,按下按键会看到窗口显示”KEY PRESS”,按Ctrl+C结束程序。
1 | gcc –Wall key.c –o key –lbcm2835 |
注:(1)bcm2835_gpio_fsel(KEY, BCM2835_GPIO_FSEL_INPT);设置管脚为输入模式
(2)bcm2835_gpio_set_pud(KEY, BCM2835_GPIO_PUD_UP);设置为上拉模式
(3) bcm2835_gpio_lev(KEY);读取管脚状态
二、wiringPi
08 | if (wiringPiSetup() < 0)return 1 ; |
10 | pullUpDnControl(KEY, PUD_UP); |
11 | printf("Key Test Program!!!\n"); |
14 | if (digitalRead(KEY) == 0) |
16 | printf ("KEY PRESS\n") ; |
17 | while(digitalRead(KEY) == 0) |
编译并执行,按下按键会看到窗口显示”KEY PRESS”,按Ctrl+C结束程序。
1 | gcc –Wall key.c –o key –wiringPi |
注:(1)pinMode (KEY,INPUT);设置管脚为输入模式
(2)pullUpDnControl(KEY, PUD_UP);设置为上拉模式
(3) digitalRead(KEY);读取管脚状态
通过中断的方式编程
18 | if(wiringPiSetup() < 0)return 1; |
19 | pinMode(button,INPUT); |
20 | pullUpDnControl(button,PUD_UP); |
21 | if(wiringPiISR(button,INT_EDGE_RISING,&myInterrupt) < 0) |
23 | printf("Unable to setup ISR \n"); |
25 | printf("Interrupt test program\n"); |
30 | while(digitalRead(button) ==0); |
31 | printf("button press\n"); |
编译并执行
1 | gcc –Wall Interrupt.c –o Interrupt -lwirngPi |
注:(1)wiringPiISR(button,INT_EDGE_FALLING,&myInterrupt);设置中断下降沿触发,myInterrupt为中断处理函数。
三、python
03 | import RPi.GPIO as GPIO |
09 | GPIO.setup(KEY,GPIO.IN,GPIO.PUD_UP) |
12 | if GPIO.input(KEY) == 0: |
14 | while GPIO.input(KEY) == 0: |
执行程序,按下按键会看到窗口显示”KEY PRESS”,按Ctrl+C结束程序。
注:(1)GPIO.setup(KEY,GPIO.IN,GPIO.PUD_UP) 设置管脚为上拉输入模式
(2)GPIO.input(KEY) 读取管脚值
通过中断模式编程
03 | import RPi.GPIO as GPIO |
12 | GPIO.setup(KEY,GPIO.IN,GPIO.PUD_UP) |
13 | GPIO.add_event_detect(KEY,GPIO.FALLING,MyInterrupt,200) |
注:(1)def MyInterrupt(KEY): 定义中断处理函数
(2) GPIO.add_event_detect(KEY,GPIO.FALLING,MyInterrupt,200) 增加事件检测,下降沿触发,忽略由于开关抖动引起的小于200ms的边缘操作。
关于树莓派事件中断编程请参考:http://www.guokr.com/post/480073/focus/1797650173/


