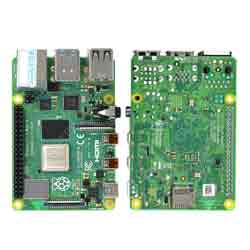
例程是通过i2c控制pcf8574 IO,使Pioneer 600扩展板的LED2闪烁。
一、bcm2835
03 | int main(int argc, char **argv) |
07 | if (!bcm2835_init())return 1; |
09 | bcm2835_i2c_setSlaveAddress(0x20); |
10 | bcm2835_i2c_set_baudrate(10000); |
15 | bcm2835_i2c_write(buf,1); |
18 | bcm2835_i2c_write(buf,1); |
编译并执行,扩展板上的LED2灯开始闪烁了,Ctrl +C结束程序
1 | gcc –Wall pcf8574 –o pfc8574 –lbcm2835 |
注:(1)bcm2835_i2c_begin(); 启动i2c操作,设置I2C相关引脚为复用功能
(2)bcm2835_i2c_setSlaveAddress(0x20); 设置I2C从机设备的地址,此处为0x20。即PCF8574的地址。
(3)bcm2835_i2c_write(buf,1);传输字节到i2c从设备,buf为要传输的数据,1表示传输一个字节
更多bcm2835库i2c操作函数请查看:http://www.airspayce.com/mikem/bcm2835/group__i2c.html#ga1309569f7363853333f3040b1553ea64
二、wiringPi
02 | #include <wiringpii2c.h> |
08 | fd = wiringPiI2CSetup(0x20); |
12 | wiringPiI2CWrite(fd,0xEF); |
14 | wiringPiI2CWrite(fd,0xFF); |
编译并执行,扩展板上的LED2灯开始闪烁了,Ctrl +C结束程序
1 | gcc –Wall pcf8574 –o pfc8574 –lbcm2835 |
注:(1)fd = wiringPiI2CSetup(0x20);初始化I2C设备,0x20为PCF8574的I2C地址,返回值是标准的Linux文件句柄,如果错误则返回-1.由此可知,wiringPi底层也是通过sysfs方式操作I2C设备/dev/i2c-1
wiringPi还有pcf8574的扩展库,也可以调用pcf8574的库操作IO.
05 | #define LED EXTEND_BASE + 4 |
09 | pcf8574Setup(EXTEND_BASE,0x20); |
13 | digitalWrite(LED,LOW); |
15 | digitalWrite(LED,HIGH); |
编译并执行
1 | gcc –Wall pcf8574.c –o pcf8474 –lwiringPi |
更多bcm2835库i2c操作函数请查看:
http://wiringpi.com/reference/i2c-library/
http://wiringpi.com/extensions/i2c-pcf8574/
三、python
首先执行如下命令安装smbus库
1 | sudo apt-get install python-smbus |
编辑程序
10 | bus.write_byte(address,0xEF) |
12 | bus.write_byte(address,0xFF) |
执行程序:
注:(1) import smbus 导入smbus模块
(2)bus = smbus.SMBus(1) 在树莓派版本2中,I2C设备位于/dev/I2C-1,所以此处的编号为1
python封装SMBUS操作函数具体代码请查看:https://github.com/bivab/smbus-cffi
四、sysfs
从上面编程,我们可以发现,wiring,python程序都是通过读写i2c设备文件/dev/I2C-1操作i2c设备。故我们也可以用c语言读写文件的形式操作i2c设备。
01 | #include <linux i2c-dev.h> |
10 | fd = open("/dev/i2c-1", O_RDWR); |
12 | printf("Error opening file: %s\n", strerror(errno)); |
15 | if (ioctl(fd, I2C_SLAVE, I2C_ADDR) < 0) { |
16 | printf("ioctl error: %s\n", strerror(errno)); |
21 | if(value == LED_ON)value = LED_OFF; |
23 | if( write( fd , &value, 1 ) != 1) { |
24 | printf("Error writing file: %s\n", strerror(errno)); |
编译并执行
1 | gcc –Wall pcf8574.c –o pcf8574 |
注:(1)fd = open("/dev/i2c-1", O_RDWR); 打开设备,树莓派版本2的I2C设备位于/dev/i2c-1
(2)ioctl(fd, I2C_SLAVE, I2C_ADDR) ; 设置I2C从设备地址,此时PCF8574的从机地址为0x20。I
(3) write( fd , &value, 1 );向PCF8574写入一个字节,value便是写入的内容,写入的长度为1.


